Finding a puddle under your Rheem AC can be a bit alarming, right? It’s one of those things that makes you stop and wonder, ‘What’s going on here?’ While it might seem like a big deal, a Rheem AC leaking water is actually a pretty common issue. The good news is, sometimes you can figure out what’s causing it and even fix it yourself. Let’s get into why this happens and what you can do about it.
Key Takeaways
- A Rheem AC leaking water is a common problem, often caused by a clogged drain line, dirty air filter, or frozen evaporator coils.
- Safety first: always turn off the power to your AC unit before attempting any inspection or troubleshooting.
- Simple DIY fixes include clearing the condensate drain line and replacing the air filter.
- If you notice significant leaks, electrical issues, or suspect a refrigerant leak, it’s best to call a professional HVAC technician.
- Regular professional maintenance and simple homeowner tasks can help prevent future Rheem AC leaks.
Understanding Why Your Rheem AC Is Leaking Water
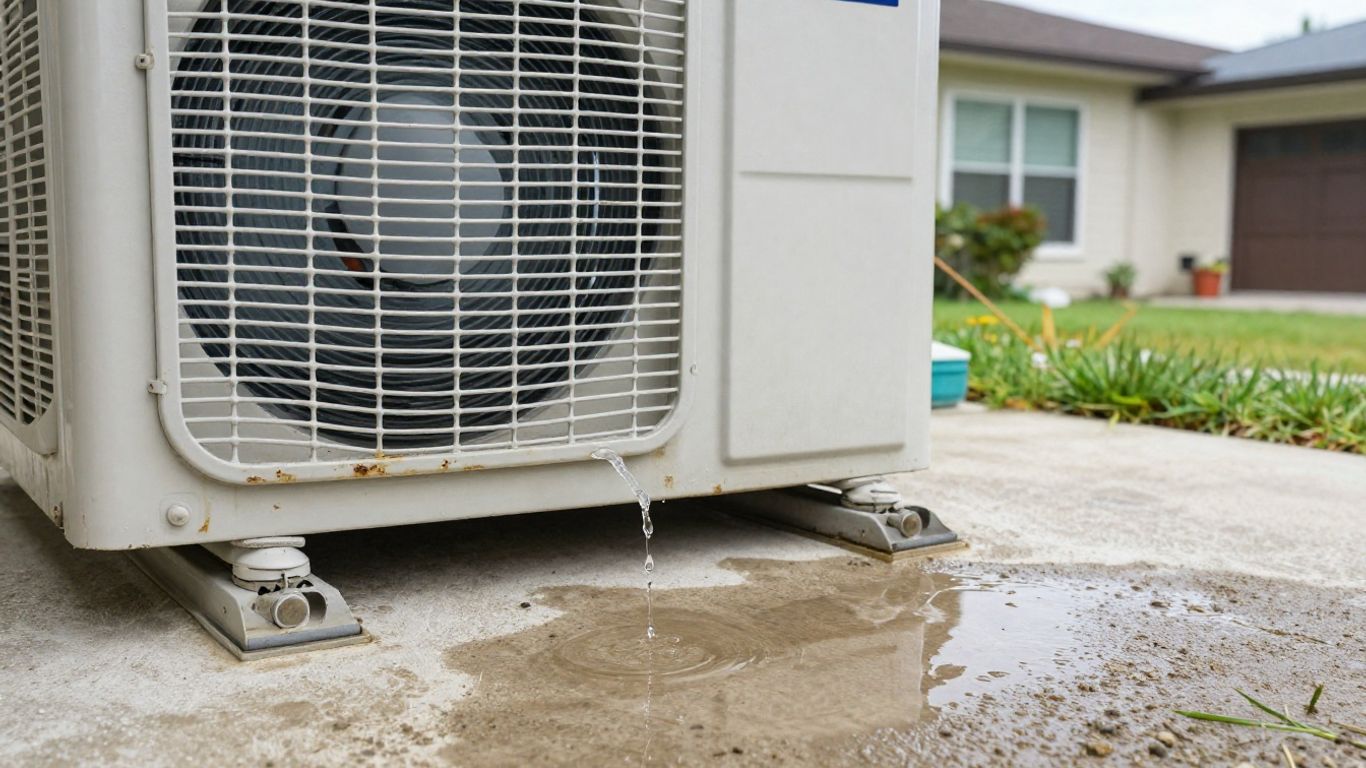
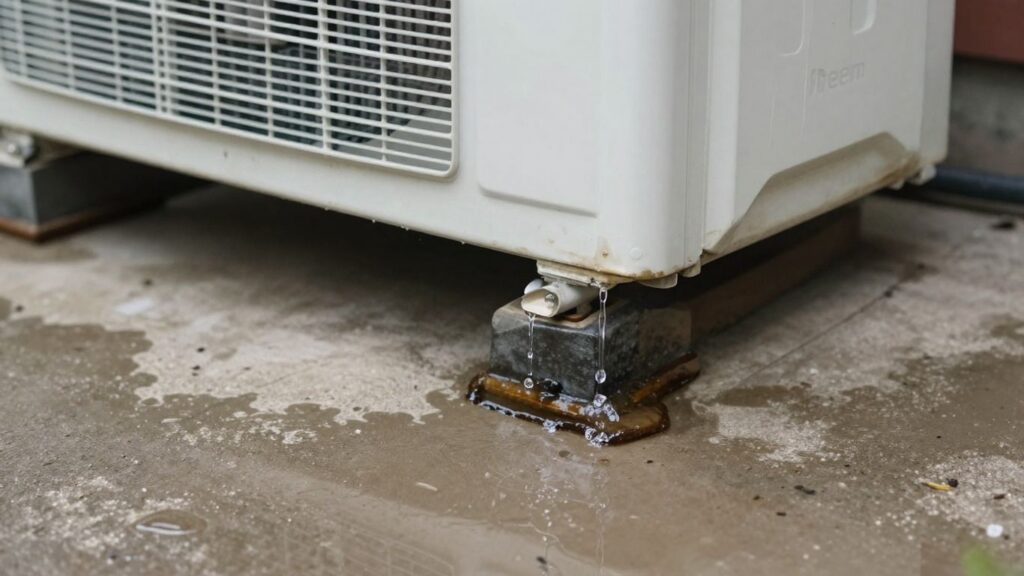
Finding a puddle of water under your Rheem AC unit can be a bit of a shock, right? It’s a common issue, but it’s definitely not something you should just ignore. A leaking AC isn’t just messy; it can signal a problem that could get worse if left unchecked.
Common Causes for Rheem AC Water Leaks
Several things can cause your Rheem air conditioner to start dripping water. Usually, it’s related to how the system handles moisture.
- Clogged Condensate Drain Line: Your AC pulls moisture out of the air as it cools. This water normally goes into a drain pan and then out through a pipe. If this pipe gets blocked with dirt, algae, or other gunk, the water backs up and has to go somewhere – usually, that’s onto your floor.
- Dirty Air Filter: A clogged air filter messes with airflow. When air can’t get to the evaporator coils properly, those coils can get too cold and freeze over. Once the ice melts, you get a lot more water than usual.
- Cracked or Damaged Drain Pan: The pan under the evaporator coils is supposed to catch condensation. Over time, these pans can rust, crack, or get damaged, leading to leaks.
- Disconnected Drain Line: Sometimes, during installation or if things get bumped, the drain line can come loose. If it’s not connected properly, the water it’s supposed to carry away just spills out.
The Role of High Humidity in AC Leaks
Living in a humid climate or during a particularly muggy spell can put extra strain on your Rheem AC. When the air is thick with moisture, your system has to work harder to pull that water out. This increased workload means more condensation is produced. While the system is designed to handle this, extreme humidity can sometimes push it over the edge, especially if there are other minor issues already present, like a slightly dirty filter or a drain line that’s not flowing perfectly.
High humidity means your AC is working overtime to dehumidify. This extra effort can sometimes reveal or worsen small problems that lead to leaks.
Identifying Other Potential Rheem AC Issues
Beyond the common culprits, a few other things might be going on:
- Frozen Evaporator Coils: We touched on this with dirty filters, but low refrigerant levels can also cause the evaporator coils to freeze. If you notice your AC isn’t cooling well and there’s water pooling, a frozen coil is a strong possibility. You might even see ice on the coils if you can safely look.
- Refrigerant Leaks: While less common as a direct cause of water leaks, low refrigerant can lead to frozen coils, which then melt and cause water issues. A refrigerant leak itself is a more serious problem that needs professional attention.
- Improper Installation: If your Rheem AC wasn’t installed perfectly level, the condensate might not drain correctly from the pan, leading to overflow and leaks. This is more likely to be an issue with newer installations or if the unit has been disturbed.
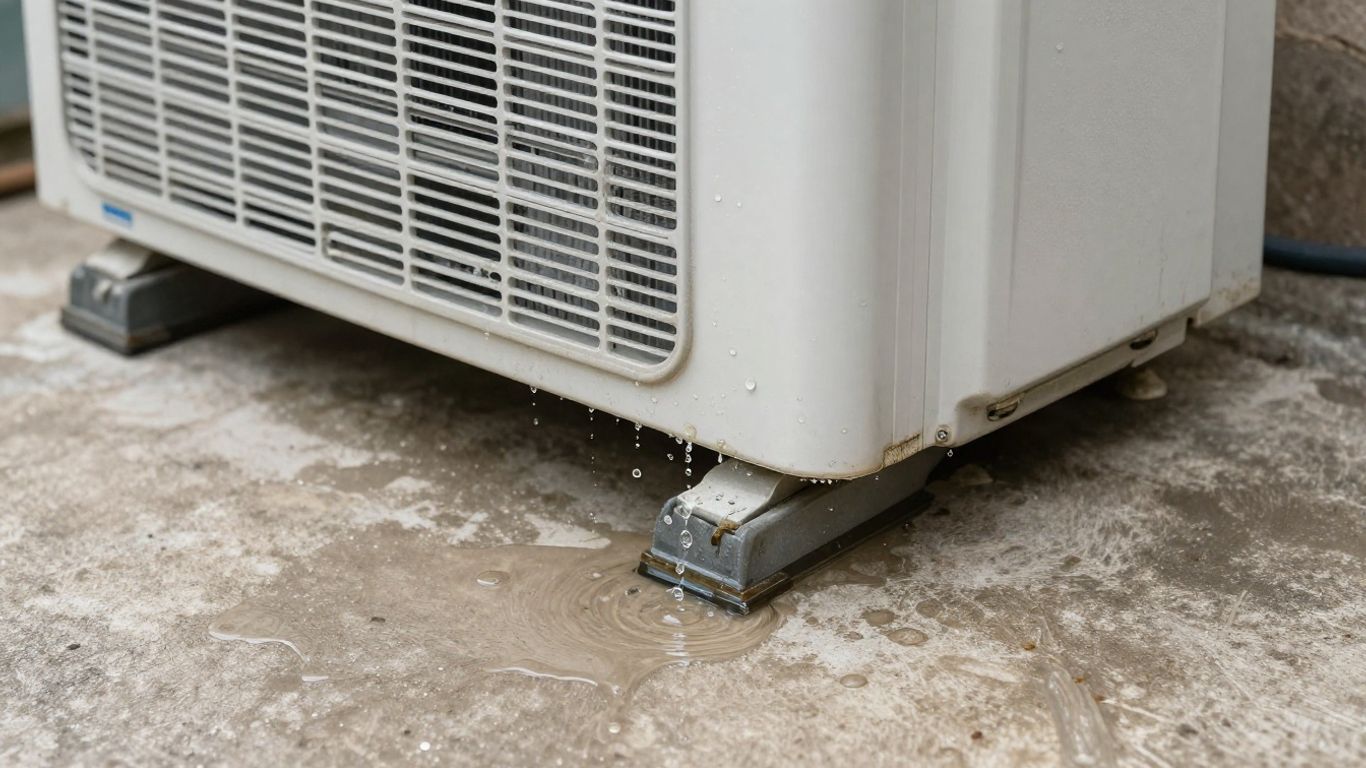
Immediate Steps When Your Rheem AC Is Leaking Water
Okay, so you’ve noticed water pooling around your Rheem AC unit. That’s definitely not ideal, and it’s a sign you need to act fast. The first thing you should do is cut the power to the unit. This isn’t just about stopping the leak; it’s a safety measure. Water and electricity are a bad mix, and you don’t want any surprises.
Prioritize Safety: Turn Off the Power
Before you even think about grabbing a towel, locate your home’s electrical panel and find the breaker that controls your air conditioning system. Flip it off. If you’re not comfortable doing this, or if you can’t easily find the right breaker, it’s better to just unplug the unit if it’s accessible. Safety first, always. This step prevents further water damage and potential electrical hazards.
Safely Remove Collected Water
Once the power is off, you’ll need to deal with the water that’s already accumulated. You can use towels to soak it up, or if there’s a significant amount, a wet-dry vacuum works wonders. Just be careful not to splash water onto any electrical components. Getting the area dry will help you better assess the situation and prevent mold or mildew from starting.
When to Call a Professional Immediately
While some AC leaks can be minor, others signal bigger problems. If you see signs of electrical damage, like frayed wires or sparks, step away and call a qualified HVAC technician right away. Also, if the leak is substantial, or if you suspect a refrigerant leak (which might have a distinct smell or cause the unit to freeze up), it’s best to get professional help. Trying to fix complex issues yourself could be dangerous or lead to more costly repairs down the line. For serious issues, don’t hesitate to contact a professional for AC repair services.
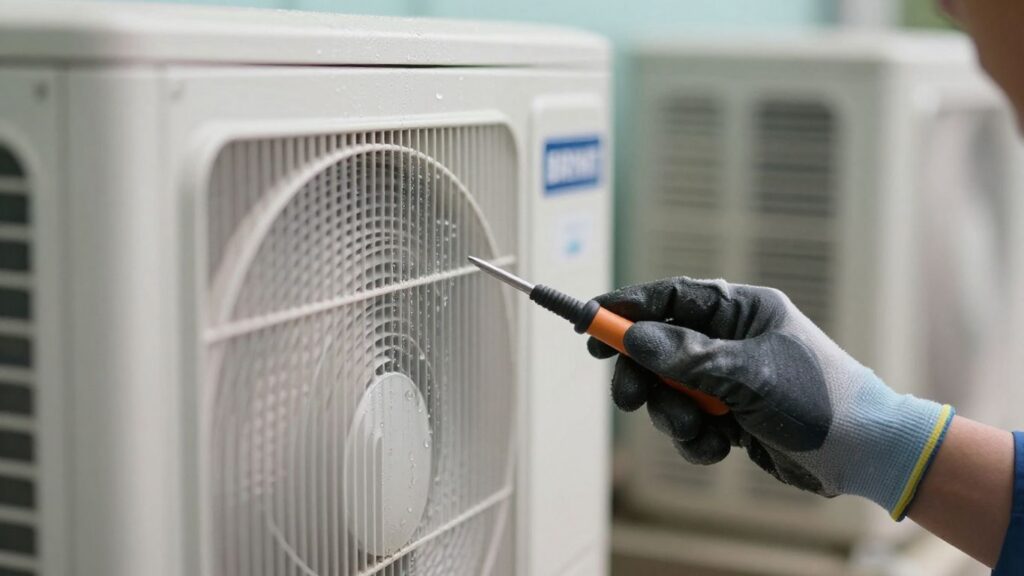
DIY Troubleshooting for a Rheem AC Leaking Water
Okay, so you’ve got a Rheem AC that’s decided to become a small indoor water feature. Before you panic and call in the cavalry, there are a few things you can check yourself. Sometimes, it’s just a simple fix that doesn’t require a professional. Just remember to be careful, especially around electrical components. Safety first, always.
Inspect and Clear the Condensate Drain Line
This is probably the most common culprit. Your AC unit pulls moisture out of the air, and that water needs somewhere to go. It collects in a drain pan and then flows out through a condensate drain line, usually a PVC pipe. Over time, gunk, algae, or even small critters can build up in there, creating a clog. When that happens, the water backs up and has to go somewhere, often overflowing the pan and dripping out.
Here’s how to tackle it:
- Locate the drain line: It typically runs from your indoor unit to the outside or into your home’s plumbing system.
- Check for blockages: You might see standing water near the indoor unit, which is a big clue.
- Clear the clog: A wet-dry vacuum can be really helpful here. Attach it to the end of the drain line and try to suck out whatever’s blocking it. You can also try gently pushing a flexible brush or wire down the line. Some folks recommend flushing it with a mixture of vinegar and water to help break down buildup and keep it clean for a while.
If you can’t easily clear the clog or if the line seems damaged, it’s time to call a pro.
Replace Your Air Filter
This one’s super simple, but it’s amazing how often a dirty air filter can cause AC problems. When your filter is clogged with dust and debris, it restricts airflow. This can make your AC’s evaporator coils work harder and, in some cases, freeze over. When those coils freeze, they eventually thaw, and all that melted ice turns into a lot of water, leading to leaks.
- Find your filter: It’s usually located behind a return air vent or near the indoor unit’s blower fan.
- Note the size: Make sure you have the correct size replacement filter on hand.
- Swap it out: Slide out the old, dirty filter and pop in the new one. Make sure any arrows on the filter are pointing in the direction of airflow (usually towards the unit).
It’s a good idea to change your air filter every 1-3 months anyway, depending on your home environment and the type of filter you use. It’s cheap insurance against bigger problems.
Examine the Drain Pan for Damage
Underneath your indoor AC unit’s evaporator coil, there’s a drain pan designed to catch any condensation. This pan can develop problems over time. Rust, corrosion, or even just age can cause it to crack or develop small holes.
- Access the pan: You might need to remove a panel or cover to get a good look at it.
- Inspect carefully: Look for any signs of rust, cracks, or holes. Even small ones can lead to leaks.
- Assess the damage: If you find minor damage, like a small crack, you might be able to patch it with a special epoxy or sealant designed for HVAC drain pans. However, if the pan is significantly rusted, cracked in multiple places, or just looks like it’s about to give up the ghost, replacement is usually the best bet.
Dealing with a damaged drain pan can be a bit messy, and if you’re not comfortable working in tight spaces or with sealants, it might be worth getting a quote from a technician. A properly functioning drain pan is key to preventing water damage to your home.
If you’ve gone through these steps and your Rheem AC is still leaking, or if you suspect a more serious issue like a refrigerant leak or electrical problem, it’s definitely time to call in a qualified HVAC professional. They have the tools and knowledge to diagnose and fix more complex problems safely.
Addressing Specific Rheem AC Leak Scenarios
Sometimes, even after you’ve tried the basic fixes, your Rheem AC might still be acting up with a leak. Let’s look at a few specific situations that can cause water to pool around your unit and what you can do about them.
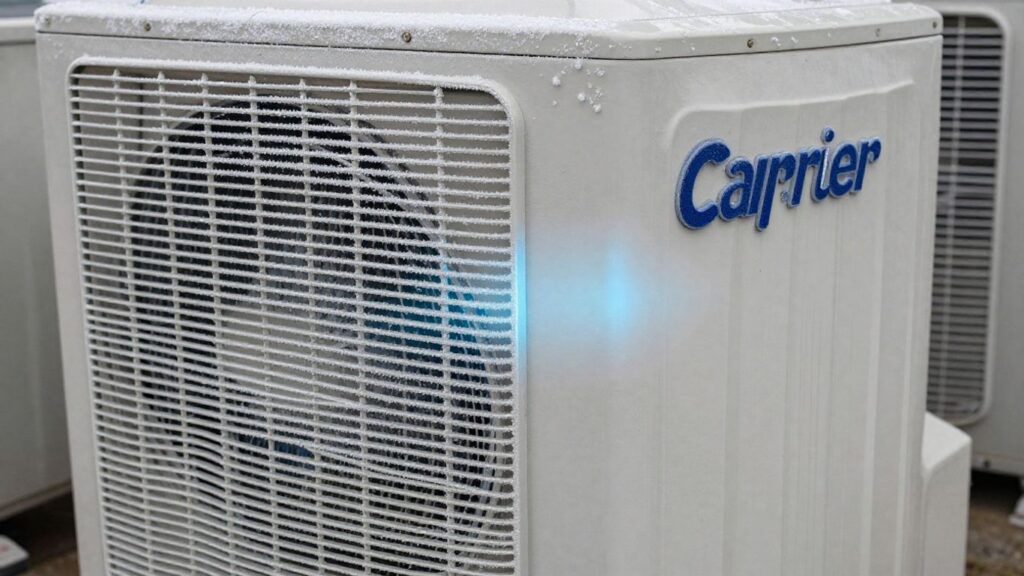
What to Do About Frozen Evaporator Coils
If you notice water, and it seems like ice is forming on the parts inside your indoor unit, you might have frozen evaporator coils. This usually happens when airflow is blocked. Think of it like a clogged drain – the water can’t get where it’s supposed to go, so it freezes up. The first thing you need to do is turn off your AC system completely. Don’t try to run it while it’s frozen; that just makes things worse. You’ll need to let it thaw out naturally. This can take several hours, so be patient. You can speed things up a bit by turning on your system’s fan (if it has a separate fan-only setting) to circulate room air over the coils. Once it’s completely thawed, check your air filter and drain line again, as these are common culprits for airflow issues. If the problem keeps happening, it might point to a bigger issue like low refrigerant, and that’s when you’ll want to call a professional.
Dealing with a Cracked or Damaged Drain Pan
The drain pan sits under your evaporator coils and is designed to catch any condensation. Over time, these pans can rust, crack, or get damaged, especially if they’re made of cheaper materials. If you see water leaking directly from the pan itself, or if you notice rust or holes in it, that’s likely your problem.
- Inspect the pan: Carefully look for any signs of damage like cracks, holes, or significant rust.
- Minor damage: For small cracks or holes, you might be able to use a waterproof epoxy or sealant designed for HVAC systems. Clean the area thoroughly before applying any repair material.
- Major damage: If the pan is heavily corroded, has multiple cracks, or is simply falling apart, it’s best to replace it. This is a job that might require a technician, especially if accessing the pan is difficult.
- Check for leaks after repair: Once you’ve attempted a fix or replaced the pan, run the AC and monitor closely to make sure the leak has stopped.
Recognizing Signs of Refrigerant Leaks
Refrigerant leaks are a bit more serious and can sometimes cause water leaks, though not always directly. If your AC isn’t cooling as well as it used to, or if you hear a hissing sound coming from the unit, it could be a sign of a refrigerant leak. You might also notice the evaporator coils freezing up more often, which, as we discussed, can lead to water leaks when the ice melts.
Refrigerant is a chemical that your AC uses to cool the air. If it’s leaking out, your system can’t do its job effectively, and it can also be harmful to the environment and your health. It’s not something you can fix yourself.
If you suspect a refrigerant leak, do not try to add more refrigerant or attempt any repairs yourself. This is a job strictly for certified HVAC technicians. They have the special tools and knowledge to safely find the leak, repair it, and recharge your system with the correct amount of refrigerant. Ignoring a refrigerant leak can lead to permanent damage to your compressor, which is a very expensive part to replace.
Preventing Future Rheem AC Leaks
No one likes returning home to discover a puddle under the AC unit. The good news? Water leaks from your Rheem AC are usually avoidable. Proactive care is the real difference-maker when it comes to long-term AC health.
The Importance of Regular Professional Maintenance
- Schedule a yearly tune-up by a qualified HVAC technician—ideally in early spring before you crank up the AC for summer.
- Professional maintenance often includes cleaning the coils, checking refrigerant levels, inspecting electrical components, and clearing the drain line.
- During these visits, technicians can spot worn-out parts or early signs of trouble that homeowners might miss.
| Maintenance Task | How Often | Who Performs |
|---|---|---|
| Professional Tune-Up | Annually (Spring) | HVAC Technician |
| Coil & Drain Cleaning | Annually | Technician |
| Air Filter Change | 1-3 months | Homeowner |
Even if your AC seems fine, skipping routine check-ups can allow gradual problems to grow—and you might not notice until water is all over your floor.
Simple Homeowner Maintenance Tasks
- Change your air filter every 1–3 months, especially during heavy use.
- Keep the area around the unit clear of clutter and dust; furniture, boxes, or dust build-up can restrict airflow.
- Every few months, pour a little distilled vinegar into the condensate drain line to help prevent algae and mold.
- Do a quick visual inspection every few weeks to spot leaks, rust, or blockages before they become big problems.
Ensuring Proper Installation and Leveling
- Confirm that the AC unit sits level—slanted or uneven units are more likely to have drain pan overflows.
- After new installation or when moving the AC, always check the base or pad with a bubble level.
- If you notice the unit has shifted due to settling or vibration, have it adjusted by a technician.
Regular maintenance and a few simple habits at home can spare you the hassle, the mess, and often the expense of dealing with big AC leaks. The small effort pays you back in peace of mind and keeps your Rheem system humming along all summer.
Conclusion
Dealing with a Rheem AC leaking water can be a hassle, but it’s not something you want to ignore. A little water here and there might be normal, but if you’re seeing puddles or steady drips, it’s time to take action. Start by shutting off your system and checking the basics—like the drain line, air filter, and drain pan. Sometimes, a quick clean or filter swap is all it takes. But if the problem keeps coming back, or you spot something you’re not comfortable fixing, don’t wait—call in a pro. Regular maintenance goes a long way in preventing leaks and keeping your AC running smoothly. At the end of the day, catching issues early can save you a lot of stress and money down the road.
Frequently Asked Questions
Is a little water around my AC a big problem?
A small amount of condensation is normal for an air conditioner. However, if you see a lot of water pooling around the unit, it’s a sign that something is wrong and needs to be checked out. Don’t ignore large leaks, as they can cause damage to your home.
Can I still use my AC if it’s leaking water?
If it’s just a tiny bit of water near the drain line and there are no other issues, your AC might be okay to run for a short while. But if the leak is significant, you notice any electrical problems, or you suspect a refrigerant leak, turn the AC off immediately and call a professional.
What’s the most common reason for an AC to leak water?
One of the most frequent causes is a clogged drain line. Over time, dirt, dust, and even algae can build up in this line, stopping the water that condenses on your AC coils from draining away properly. This backup causes water to spill out.
How can I prevent my Rheem AC from leaking in the future?
Regular maintenance is key! Schedule annual check-ups with an HVAC professional to keep everything clean and working right. Also, changing your air filter regularly and keeping the area around your unit clear of debris can help prevent problems.
What should I do if my AC’s drain line is clogged?
First, turn off the power to your AC for safety. Then, you can try to clear the clog yourself using a wet-dry vacuum on the end of the drain line or a flexible brush. Sometimes, flushing the line with a mixture of vinegar and water can help. If you’re not comfortable doing this, or if the clog is stubborn, it’s best to call a technician.
When should I call an expert instead of trying to fix it myself?
If you notice refrigerant leaks, electrical issues, or major damage to parts like the drain pan, it’s time to call a professional. These types of problems can be dangerous to fix on your own and require specialized knowledge and tools.